Spring Boot + Angular : Shopping Site 만들기 v2 - 4 - 키워드 검색기능 - Rest Repository with JPA
0. 이 포스트는 아래의 v2의 클라이언트 구현의 상품 검색기능에 대한 내용이다.
1. 서버에서 이미 상품검색 기능을 추가되어 있다. 이 기능을 활용하는 서비스 메소드를 작성한다.
1-1 기존에 있는 getProducts메소드는 더 이상 사용되지 않기 때문에 이것을 검색용으로 변경한다.
1-2 product-service.ts에서 아래처럼 수정한다.
  getProuductsByName(keyword: string): Observable<Product[]> {
    const targetUrl = `${this.baseUrl}/products/search/findByNameContaining?keyword=${ keyword }`

    return this.getProductList(targetUrl)
  }
2. 이제 product-search.component에서 검색어를 입력받는 부분을 작성한다.
2-1 view를 다음과 같이 작성한다.
2-1-1 input element에 'keywordInput' reference를 붙여서 button 클릭 시 입력된 데이터를 참조하게 작성한다.
2-1-2 input element는 Enter가 눌렀을 때 동작하는 이벤트가 발생했을 때 onSearchInput 메소드를 호출하게 된다.
2-1-3 버튼의 click 이벤트도 동일하게 동작하게 된다. $event.target.value는 input element의 value값을 읽어온다.
<form class="form-header" onsubmit="return false;" method="GET">
  <input #keywordInput (keyup.enter)="onSearchInput($event.target.value)"
    class="au-input au-input-xl" type="text" name="search" placeholder="Search for data ..." />
  <button (click)="onSearchInput(keywordInput.value)" class="au-btn-submit" type="submit">
    Search
  </button>
</form>
2-2 component 클래스를 작성한다.
2-2-1 이 클래스는 Router 클래스를 주입받아 키워드 검색이 발생했는데, 키워드를 포함한 url로 전환해 준다.
import { Component, OnInit } from '@angular/core';
import { Router } from '@angular/router';

@Component({
  selector: 'app-product-search',
  templateUrl: './product-search.component.html',
  styleUrls: ['./product-search.component.css']
})
export class ProductSearchComponent implements OnInit {

  constructor(private router: Router) { }

  ngOnInit(): void {
  }

  onSearchInput(keyword: string) {
    this.router.navigateByUrl(`/search/${ keyword }`)
  }
}
2-2-2 전환된 /search/:keyword url을 처리하기 위해서 app.module.ts에 경로를 추가해 준다.
2-2-2-1 제일 상단의 추가한 경로가 있다.
const routes: Routes = [
  { path: 'search/:keyword', component: ProductListComponent },
  { path: 'category/:id/:name', component: ProductListComponent },
  { path: 'category', component: ProductListComponent },
  { path: 'products', component: ProductListComponent },
  { path: '', component: ProductListComponent },
  { path: '**', component: ProductListComponent }
]
2-3 이제 ProductListComponent에서 해당 url를 받아서 검색을 수행한다.
2-3-1 검색기능이 추가되어 2 형태의 url을 처리해야 한다.
2-3-2 이를 위해 getProducts의 내용을 handleGetProducts로 옮기고 handleGetSearchProducts 메소드를 만든다.
2-3-3 기존의 getProducts에는 검색키워드가 URL의 path variable로 있는 경우 검색는 검색으로 처리하고
2-3-4 없는 경우 일반 카테고리 검색을 수행한다.
2-3-5 검색의 경우에도 안내 구문 표출을 위해 currentCategoryName에 Search를 명기하고 검색어를 표출하였다.
import { Component, OnInit } from '@angular/core';
import { Product } from 'src/app/common/product';
import { ProductService } from 'src/app/services/product.service';
import { ActivatedRoute } from '@angular/router';

@Component({
  selector: 'app-product-list',
  templateUrl: './product-list.component.html',
  styleUrls: ['./product-list.component.css']
})
export class ProductListComponent implements OnInit {

  products: Product[]

  currentCategoryId: string;
  currentCategoryName: string;

  constructor(private productService: ProductService, private route: ActivatedRoute) { }

  ngOnInit(): void {
    this.route.paramMap.subscribe(
      ()=> this.getProducts()
    )
  }

  getProducts(): void {
    if (this.route.snapshot.paramMap.has("keyword")) {
      this.handleSearchProducts()
    } else {
      this.handleGetProducts()
    }
  }

  private handleSearchProducts() {
    const keyword = this.route.snapshot.paramMap.get("keyword")
    this.currentCategoryName = 'Search: ' + keyword
    this.productService.getProuductsByName(keyword).subscribe(
      data=> this.products = data
    )
  }

  private handleGetProducts() {
    if (this.route.snapshot.paramMap.has("id")) {
      this.currentCategoryId = this.route.snapshot.paramMap.get("id")
      this.currentCategoryName = this.route.snapshot.paramMap.get("name")
    } else {
      this.currentCategoryId = "1"
      this.currentCategoryName = "Books"
    }
    this.productService.getProductsByCategoryId(this.currentCategoryId).subscribe(
      data => this.products = data
    );
  }
}
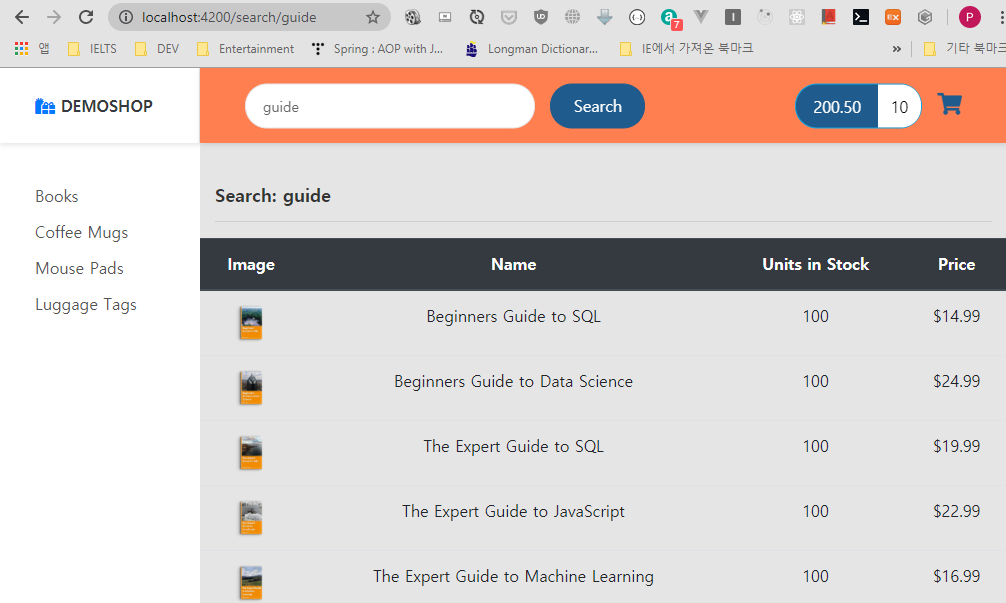
2-4 결과화면이다. 화면은 guide로 검색한 내용이 표출된다.