
티스토리 뷰
Spring Security : FootBall Club example에 Security 적용하기
Korean Eagle 2020. 7. 1. 19:040. 지난 포스트는 이 포스트의 후속인데 순서가 뒤바뀌어 있다.
0-1 전체 소스도 아래부분을 포함하여 사용자와 팀과 매핑한 부분도 포함되어 있다.
0-2 아래 포스트를 보면 이전 포스트의 TeamController의 processTeamSetup 코드와 약간 다른데
0-2-1 더블클릭 방지를 위한 부분이 들어 있다.
0-2-2 첫 클릭시에 이미 SessionStatus가 complete되어 버리는데
0-2-3 더블 클릭시에는 세션 데이터가 없기 때문에 team 속성을 가지고 올 때 에러가 난다. 그 부분을 수정했다.
Spring Security : Authentication 사용하기
1. Authentication은 인증 토큰이라고 할 수 있다. 1-1 인증토큰이라면 인증을 위한 정보를 가진 하나의 단위라고 생각하면 된다. 1-2 이 토큰이 인증이 된 것일 수도 아닐 수도 있다. 2. Controller에서 enti
kogle.tistory.com
1. 이 포스트는 지난 시리즈에 이어서 같은 프로그램을 Spring Securtiy를 적용하는 것을 보여준다.
1-1 UserDetails, UserDetailsService 인터페이스를 사용하는 방법
1-2 SecurityConfig 설정하는 방법
1-3 접근 제어 방법
1-4 로그인, 가입화면 작성
2. 보안 적용 내용은
2-1 h2를 그대로 사용하고 인증만 UserDetailsService로 바꾼다.
2-2 /players, /teams 페이지는 로그인 인증을 통과한 유저만 사용가능하도록 한다.
2-3 구현할 때 스프링 보안에서 지정하는 authorities 테이블은 사용하지 않는다.
2-3-1 spring security 기본 스키마는 아래 링크 2번 항목을 참고한다.
Spring Security : Web MVC + Security + JDBC 으로 인증 구현하기
0. 이 포스트는 이전 Spring : Web MVC + Spring 시리즈의 연속이다. 1. 이 포스트는 in-Memory 인증에서 MySql(JDBC)을 이용한 인증으로 프로그램을 변경하는 내용이다. 1-1 in Memory 인증은 아래 링크한 포스트..
kogle.tistory.com
2-4 로그인 화면을 작성한다.
2-5 등록 화면을 작성한다.
3. 우선 Spring Security를 pom에 추가한다.

4. entity 패키지 이름을 model로 바꾸었다. 아무 의미 없다.
5. users 테이블만 사용하므로 User Entity를 생성하고 UserDetails를 구현하는 일반적인 방식을 따른다.
5-1 User Entity
5-1-1 소스를 보면 대부분의 메소드들은 UserDeails 인터페이스에서 온 것이다.
5-1-1-1 UserDetails을 구현하는 클래스는 username, password, authorites속성을 반드시 가지고 있어야 한다.
5-1-1-2 authorities는 GrantedAuthority 인터페이스를 구현한 한 클래스이다.
public interface GrantedAuthority extends Serializable {
	String getAuthority();
}
5-1-1-2-1 GrantedAuthority라는 이름은 거창한데 이것을 구현한 클래스는 속성에 권한이름만 있으면 된다.
5-1-1-2-2 눈에 띄는 부분은 Authority를 데이터베이스에서 받아오지 않고 그냥 ROLE_USER로 고정한 부분이다.
5-1-1-2-3 이건 귀찮하서 하지 않은 부분이다. 권한 부분이 필요하다면 할지도 모르겠다.
5-1-1-3 나머지는 무시해도 되고 추가로 이름, 주소속성을 추가하였다.
5-1-1-4 Address는 이전에도 설명한 Embedded로 지정되어 있다. 아래 링크의 3.3 항목을 참고한다.
Spring Basic : JPA를 이용한 FootBall Club example
1. 이 포스트는 지난 시리즈에 이어서 같은 프로그램을 JPA로 구현하는 것을 보여준다. 1-1 화면과 데이터베이스 조회 결과는 이전 포스트를 참고한다. Spring Basic : JDBC를 이용한 FootBall Club example 1..
kogle.tistory.com
package pe.pilseong.footballjpa.model;

import java.util.Arrays;
import java.util.Collection;

import javax.persistence.Embedded;
import javax.persistence.Entity;
import javax.persistence.GeneratedValue;
import javax.persistence.GenerationType;
import javax.persistence.Id;
import javax.persistence.Table;

import org.springframework.security.core.GrantedAuthority;
import org.springframework.security.core.authority.SimpleGrantedAuthority;
import org.springframework.security.core.userdetails.UserDetails;

import lombok.AccessLevel;
import lombok.Data;
import lombok.NoArgsConstructor;
import lombok.RequiredArgsConstructor;

@Entity
@Table(name = "users")
@Data
@NoArgsConstructor(access = AccessLevel.PRIVATE, force = true)
@RequiredArgsConstructor
public class User implements UserDetails {

  private static final long serialVersionUID = 1L;

  @Id
  @GeneratedValue(strategy = GenerationType.IDENTITY)
  private final Long id;

  private final String username;

  private final String password;

  private final String fullname;

  private final String phoneNumber;

  @Embedded
  private final Address address;

  @Override
  public Collection<? extends GrantedAuthority> getAuthorities() {
    return Arrays.asList(new SimpleGrantedAuthority("ROLE_USER"));
  }

  @Override
  public boolean isAccountNonExpired() {
    return true;
  }

  @Override
  public boolean isAccountNonLocked() {
    return true;
  }

  @Override
  public boolean isCredentialsNonExpired() {
    return true;
  }

  @Override
  public boolean isEnabled() {
    return true;
  }
}
5-2 유저를 생성했으니 UserRepository, UserDetailsService 구현체를 생성하고 SecurtyConfig에서 연결만하면 된다.
5-3 UserRepository 구현
5-3-1 UserDetailsDetails의 loadUserByUsername에서 사용할 findByUsername을 JpaRepository에서 자동구현하였다.
package pe.pilseong.footballjpa.repository;

import org.springframework.data.jpa.repository.JpaRepository;

import pe.pilseong.footballjpa.model.User;

public interface UserRepository extends JpaRepository<User, Long> {
  User findByUsername(String username);
}
5-4 UserDetailsService 구현체
5-4-1 여기서 UserRepository를 주입받아 유저정보를 가지고 온다.
5-4-2 User entity가 UserDetails인터페이스를 사용하므로 엄청 편리해졌다.
5-4-3 loadUserByUsername은 못찾으면 UsernameNotFoundException을 발생시킨다.
5-4-3-1 여기서도 규정에 맞게 유저가 없으면 UsernameNotFoundException처리를 하였다.
package pe.pilseong.footballjpa.service;

import org.springframework.beans.factory.annotation.Autowired;
import org.springframework.security.core.userdetails.UserDetails;
import org.springframework.security.core.userdetails.UserDetailsService;
import org.springframework.security.core.userdetails.UsernameNotFoundException;
import org.springframework.stereotype.Service;

import pe.pilseong.footballjpa.repository.UserRepository;

@Service
public class UserServiceImpl implements UserDetailsService {

  @Autowired
  private UserRepository userRepository;

  @Override
  public UserDetails loadUserByUsername(String username) throws UsernameNotFoundException {

    // if not found, it will return null
    UserDetails user = this.userRepository.findByUsername(username);

    if (user != null) {
      return user;
    }

    throw new UsernameNotFoundException("User '" + username + "' not found");
  }

}
6. 이제 SecurityConfig에서 이 UserDetailsService를 사용하도록 연결만 하면 된다.
6-1 아래 설정파일을 보면 UserDetailsService를 주입받아 온다.
6-2 이 서비스를 configure에서 로컬 인증관리자를 만들 때 서비스를 지정하고, 암호화 방식을 지정하였다.
6-3 /players, /teams는 인증한 사용자만 볼 수 있게 하였다. 권한없는 사람이 접근하면 /login으로 전환된다.
6-4 /login 경로로 login 페이지 접근을 설정하였다.
6-5 logout은 url에 /logout을 설정하면 로그아웃되도록 설정하였다.
6-6 마지막 두 줄은 보안에 문제가 생기지만 h2-console을 접근하기 위해서 설정한 내용이다.
6-6-1 h2는 내장 DB이기 때문에 접근 시 Spring security의 제어를 받아서 어쩔 수 없다.
6-6-2 그래서 h2는 테스트 용도로만 사용해야 한다.
package pe.pilseong.footballjpa.config;


import org.springframework.beans.factory.annotation.Autowired;
import org.springframework.context.annotation.Bean;
import org.springframework.context.annotation.Configuration;
import org.springframework.security.config.annotation.authentication.builders.AuthenticationManagerBuilder;
import org.springframework.security.config.annotation.web.builders.HttpSecurity;
import org.springframework.security.config.annotation.web.configuration.EnableWebSecurity;
import org.springframework.security.config.annotation.web.configuration.WebSecurityConfigurerAdapter;
import org.springframework.security.core.userdetails.UserDetailsService;
import org.springframework.security.crypto.bcrypt.BCryptPasswordEncoder;
import org.springframework.security.crypto.password.PasswordEncoder;

@Configuration
@EnableWebSecurity
public class SecurityConfig extends WebSecurityConfigurerAdapter {

  @Autowired
  private UserDetailsService userDetailsService;

  @Bean
  public PasswordEncoder passwordEncoder() {
    return new BCryptPasswordEncoder();
  }

  @Override
  protected void configure(AuthenticationManagerBuilder auth) throws Exception {

    auth.userDetailsService(userDetailsService)
      .passwordEncoder(passwordEncoder());
  }

  @Override
  protected void configure(HttpSecurity http) throws Exception {
    http.authorizeRequests()
        .antMatchers("/players", "/teams").hasRole("USER")
        .antMatchers("/**").permitAll().and()
      .formLogin().loginPage("/login").defaultSuccessUrl("/players").and()
      .logout();

    http.csrf().disable();
    http.headers().frameOptions().disable();
  }
}
6-7 로그인 기능 작성
6-7-1 로그인 컨트롤러 설정
6-7-1-1 View Controller로도 작성할 수 있는데, 그냥 만들었다.
6-7-1-2 보안 설정을 보면 알 수 있듯, 이 프로그램은 스프링 보안의 built-in login 방식을 사용하고 있다.
package pe.pilseong.footballjpa.controller;


import org.springframework.stereotype.Controller;
import org.springframework.web.bind.annotation.GetMapping;
import org.springframework.web.bind.annotation.ModelAttribute;

import pe.pilseong.footballjpa.DTO.LoginForm;

@Controller
public class LoginController {

  @ModelAttribute
  public LoginForm loginForm() {
    return new LoginForm();
  }

  @GetMapping("/login")
  public String login() {
    return "login";
  }

}
6-7-2 여기의 login 속성은 사실 의미가 없다. 어차피 로그인 검증은 스프링이 하므로 form validation이 되지 않는다.
<!DOCTYPE html>
<html xmlns:th="http://www.thymeleaf.org">
<head>
<meta charset="UTF-8">
<link rel="stylesheet"
  href="https://stackpath.bootstrapcdn.com/bootstrap/4.4.1/css/bootstrap.min.css"
  integrity="sha384-Vkoo8x4CGsO3+Hhxv8T/Q5PaXtkKtu6ug5TOeNV6gBiFeWPGFN9MuhOf23Q9Ifjh"
  crossorigin="anonymous">
<title>Spring Security Custom Login Form</title>
</head>
<body>
  <div class="container">
    <div class="card" style="width: 350px; margin-left: auto; margin-right: auto; border: none;">
      <h1 class="display-4">Please Login</h1>

      <form th:action="@{/login}" method="POST" th:object="${loginForm}">

        <p th:if="${ param.error != null }">
          <small id="passwordHelpBlock" class="form-text text-warning">
            Sorry! You entered invalid username/password.
          </small>
        </p>
        <p th:if="${ param.logout != null }">
          <small id="passwordHelpBlock" class="form-text text-info">
            You have been logged out.
          </small>
        </p>

        <div class="form-group">
          <label for="username">Username</label>
          <input type="text" th:field="*{username}" id="username" class="form-control" />
        </div>
        <div class="form-group">
          <label for="password">Password</label>
          <input type="password" th:field="*{password}" id="password" class="form-control">
        </div>
        <input type="submit" value="Login" class="btn btn-primary">
      </form>

      <!-- Registration Button -->
      <div class="mt-3">
        <a th:href="@{/register}" class="btn btn-info"> Register New User </a>
      </div>
    </div>
  </div>

  <script src="https://code.jquery.com/jquery-3.4.1.slim.min.js"
    integrity="sha384-J6qa4849blE2+poT4WnyKhv5vZF5SrPo0iEjwBvKU7imGFAV0wwj1yYfoRSJoZ+n"
    crossorigin="anonymous"></script>
  <script
    src="https://cdn.jsdelivr.net/npm/popper.js@1.16.0/dist/umd/popper.min.js"
    integrity="sha384-Q6E9RHvbIyZFJoft+2mJbHaEWldlvI9IOYy5n3zV9zzTtmI3UksdQRVvoxMfooAo"
    crossorigin="anonymous"></script>
  <script
    src="https://stackpath.bootstrapcdn.com/bootstrap/4.4.1/js/bootstrap.min.js"
    integrity="sha384-wfSDF2E50Y2D1uUdj0O3uMBJnjuUD4Ih7YwaYd1iqfktj0Uod8GCExl3Og8ifwB6"
    crossorigin="anonymous"></script>
</body>
</html>
6-7-2 등록 기능 작성
6-7-2-1 등록은 스프링보안과 상관없으므로 form 검증을 사용할 수 있다.
6-7-2-2 그렇기 때문에 @ModelAttribute로 RegistrationForm 객체를 생성하여 바이딩하고 있다.
6-7-2-3 다음 항목에서 제시한 view에서 정보를 받아 POST하면 아래 processRegistration에서 처리한다.
package pe.pilseong.footballjpa.controller;

import javax.validation.Valid;

import org.springframework.beans.factory.annotation.Autowired;
import org.springframework.security.crypto.password.PasswordEncoder;
import org.springframework.stereotype.Controller;
import org.springframework.ui.Model;
import org.springframework.validation.BindingResult;
import org.springframework.web.bind.annotation.GetMapping;
import org.springframework.web.bind.annotation.ModelAttribute;
import org.springframework.web.bind.annotation.PostMapping;
import org.springframework.web.bind.annotation.RequestMapping;

import lombok.extern.slf4j.Slf4j;
import pe.pilseong.footballjpa.DTO.RegistrationForm;
import pe.pilseong.footballjpa.repository.UserRepository;

@Slf4j
@Controller
@RequestMapping("/register")
public class RegistrationController {

  @Autowired
  private UserRepository userRepository;

  @Autowired
  private PasswordEncoder passwordEncoder;

  @ModelAttribute(name = "form")
  public RegistrationForm form() {
    return new RegistrationForm();
  }

  @GetMapping
  public String showRegistrationForm(Model model) {
    log.info("showRegistrationForm in RegistrationController");
    return "registration-form";
  }

  @PostMapping
  public String processRegistration(@Valid @ModelAttribute("form") RegistrationForm form,
    BindingResult errors, Model model) {
    log.info(("processRegistration in UserController :: " + form.toString()));

    if (errors.hasErrors()) {
      log.info(errors.toString());
      return "registration-form";
    }

    this.userRepository.save(form.toUser(this.passwordEncoder));
    return "redirect:login";
  }
}
6-7-3 등록 화면 view
6-7-3-1 view 만드는 게 제일 힘들다. 그냥 대강했다. RegistrationForm을 바인하여 정보를 받아온다.
<!DOCTYPE html>
<html xmlns:th="http://www.thymeleaf.org">

<head>
<meta charset="UTF-8">
<meta name="viewport" content="width=device-width, initial-scale=1, shrink-to-fit=no">
<link rel="stylesheet"
  href="https://stackpath.bootstrapcdn.com/bootstrap/4.4.1/css/bootstrap.min.css"
  integrity="sha384-Vkoo8x4CGsO3+Hhxv8T/Q5PaXtkKtu6ug5TOeNV6gBiFeWPGFN9MuhOf23Q9Ifjh"
  crossorigin="anonymous">
<title>Registration Form</title>
</head>
<body>
  <div class="container">
    <div class="card" style="width: 800px; margin-left: auto; margin-right: auto; border: none;">
      <h1 class="display-4 mb-3">Registration</h1>
      <p th:if="${error != null}" class="bg-danger">
        <small th:text="${error}" class="text-light"></small>
      </p>
      <form th:action="@{/register}" th:object="${form}" method="POST" >

        <div class="form-group row mb-1">
          <label for="username" class="col-sm-3 col-form-label">Username</label>
          <div class="col-sm-9">
          <input type="text" id="username" name="username" class="form-control" th:field="*{username}"/>
          </div>
          <div th:if="${#fields.hasErrors('username')}" class="alert alert-danger text-muted my-1 py-1 small"
          th:errors="*{username}"></div>
        </div>
        <div class="form-group row mb-1">
          <label for="password" class="col-sm-3 col-form-label">Password</label>
          <div class="col-sm-9">
          <input type="password" id="password" class="form-control" th:field="*{password}" />
          </div>
          <div th:if="${#fields.hasErrors('password')}" class="alert alert-danger text-muted my-1 py-1 small"
          th:errors="*{password}"></div>
        </div>
        <div class="form-group row mb-1">
          <label for="matchingPassword" class="col-sm-3 col-form-label">Confirm Password</label>
          <div class="col-sm-9">
          <input type="password" id="matchingPassword" class="form-control" th:field="*{matchingPassword}"/>
          </div>
          <div th:if="${#fields.hasErrors('matchingPassword')}" class="alert alert-danger text-muted my-1 py-1 small"
          th:errors="*{matchingPassword}"></div>
        </div>
        <div class="form-group row mb-1">
          <label for="fullname" class="col-sm-3 col-form-label">Fullname</label>
          <div class="col-sm-9">
          <input type="text" id="fullname" class="form-control" th:field="*{fullname}"/>
          </div>
          <div th:if="${#fields.hasErrors('fullname')}" class="alert alert-danger text-muted my-1 py-1 small"
          th:errors="*{fullname}"></div>
        </div>
        <div class="form-group row mb-1">
          <label for="phoneNumber" class="col-sm-3 col-form-label">Phone Number</label>
          <div class="col-sm-9">
          <input type="text" id="phoneNumber" class="form-control" th:field="*{phoneNumber}"/>
          </div>
          <div th:if="${#fields.hasErrors('phoneNumber')}" class="alert alert-danger text-muted my-1 py-1 small"
          th:errors="*{phoneNumber}"></div>
        </div>
        <div class="form-group row mb-1">
          <label for="street" class="col-sm-3 col-form-label">Street</label>
          <div class="col-sm-9">
          <input type="text" id="street" class="form-control" th:field="*{street}" />
          </div>
          <div th:if="${#fields.hasErrors('street')}" class="alert alert-danger text-muted my-1 py-1 small"
          th:errors="*{street}"></div>
        </div>
        <div class="form-group row mb-1">
          <label for="city" class="col-sm-3 col-form-label">City</label>
          <div class="col-sm-9">
          <input type="text" id="city" class="form-control" th:field="*{city}" />
          </div>
          <div th:if="${#fields.hasErrors('city')}" class="alert alert-danger text-muted my-1 py-1 small"
          th:errors="*{city}"></div>
        </div>
        <div class="form-group row mb-1">
          <label for="state" class="col-sm-3 col-form-label">State</label>
          <div class="col-sm-9">
          <input type="text" id="state" class="form-control" th:field="*{state}" />
          </div>
          <div th:if="${#fields.hasErrors('state')}" class="alert alert-danger text-muted my-1 py-1 small"
          th:errors="*{state}"></div>
        </div>
        <div class="form-group row mb-1">
          <label for="country" class="col-sm-3 col-form-label">Country</label>
          <div class="col-sm-9">
          <input type="text" id="country" class="form-control" th:field="*{country}" />
          </div>
          <div th:if="${#fields.hasErrors('country')}" class="alert alert-danger text-muted my-1 py-1 small"
          th:errors="*{country}"></div>
        </div>
        <div class="mt-3">
          <button class="btn btn-primary">Register</button>
          <a th:href="@{/login}" class="btn btn-info">Back to Login</a>
        </div>
      </form>
    </div>
  </div>


  <script src="https://code.jquery.com/jquery-3.4.1.slim.min.js"
    integrity="sha384-J6qa4849blE2+poT4WnyKhv5vZF5SrPo0iEjwBvKU7imGFAV0wwj1yYfoRSJoZ+n"
    crossorigin="anonymous"></script>
  <script
    src="https://cdn.jsdelivr.net/npm/popper.js@1.16.0/dist/umd/popper.min.js"
    integrity="sha384-Q6E9RHvbIyZFJoft+2mJbHaEWldlvI9IOYy5n3zV9zzTtmI3UksdQRVvoxMfooAo"
    crossorigin="anonymous"></script>
  <script
    src="https://stackpath.bootstrapcdn.com/bootstrap/4.4.1/js/bootstrap.min.js"
    integrity="sha384-wfSDF2E50Y2D1uUdj0O3uMBJnjuUD4Ih7YwaYd1iqfktj0Uod8GCExl3Og8ifwB6"
    crossorigin="anonymous"></script>
</body>
</html>
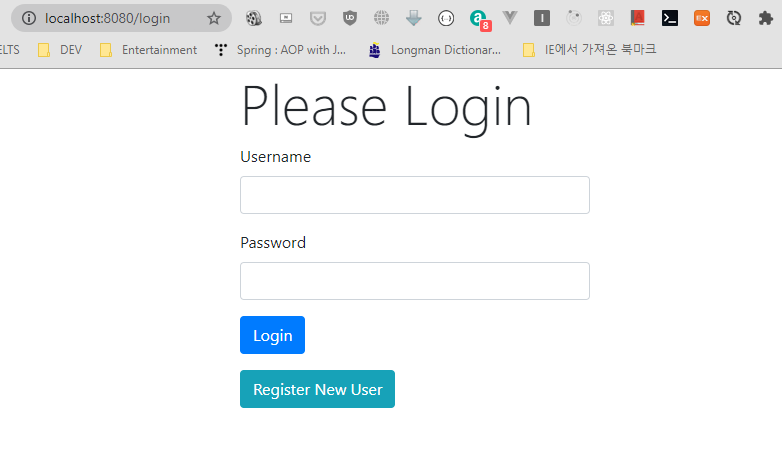
7. 결과화면
7-1 로그인 화면
7-2 등록화면

'Demos > Football Club' 카테고리의 다른 글
- Total
- Today
- Yesterday
- 도커 개발환경 참고
- AWS ARN 구조
- Immuability에 관한 설명
- 자바스크립트 멀티 비동기 함수 호출 참고
- WSDL 참고
- SOAP 컨슈머 참고
- MySql dump 사용법
- AWS Lambda with Addon
- NFC 드라이버 linux 설치
- electron IPC
- mifare classic 강의
- go module 관련 상세한 정보
- C 메모리 찍어보기
- C++ Addon 마이그레이션
- JAX WS Header 관련 stackoverflow
- SOAP Custom Header 설정 참고
- SOAP Custom Header
- SOAP BindingProvider
- dispatcher 사용하여 설정
- vagrant kvm으로 사용하기
- git fork, pull request to the …
- vagrant libvirt bridge network
- python, js의 async, await의 차이
- go JSON struct 생성
- Netflix Kinesis 활용 분석
- docker credential problem
- private subnet에서 outbound IP 확…
- 안드로이드 coroutine
- kotlin with, apply, also 등
- 안드로이드 초기로딩이 안되는 경우
- navigation 데이터 보내기
- 레이스 컨디션 navController
- raylib
- mapping
- one-to-many
- Angular
- Security
- one-to-one
- crud
- form
- 설정
- RestTemplate
- 자바
- 로그인
- Spring Security
- 외부파일
- Many-To-Many
- WebMvc
- login
- 상속
- Spring
- 매핑
- Validation
- hibernate
- 하이버네이트
- MYSQL
- spring boot
- XML
- 스프링
- Rest
- 설정하기
- jsp
- 스프링부트